
You can edit reports on Shopify if they provide too much or not enough information for specific cases. However, only Advanced Shopify or higher allows you to save and reopen adjusted reports. If you are on the Shopify plan, you can edit and print or export reports, but you cannot save them. To adjust your report, read this post to learn how to add or remove columns in your reports. To learn how to create custom reports, read this post to learn more.
Here is a guide on adding or removing columns in your reports.
First, select a report to work on.
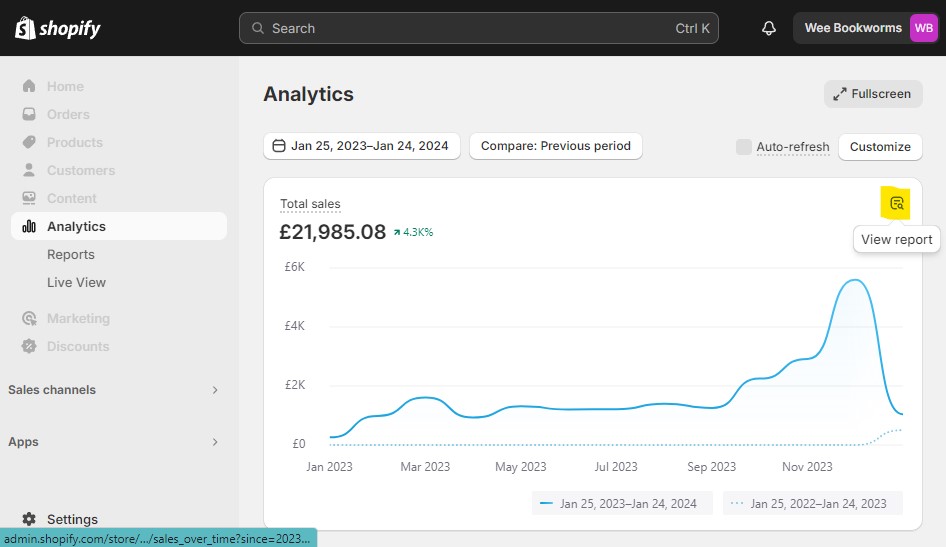
To access your Shopify account, sign in and go to Analytics. You will find the Dashboards section where you can choose a report by clicking View report. Make sure you are familiar with the overview dashboard. If you can’t find the report you want in Dashboards, click on Reports to view all your reports and find the one you need.
Next, choose the “Edit” column.
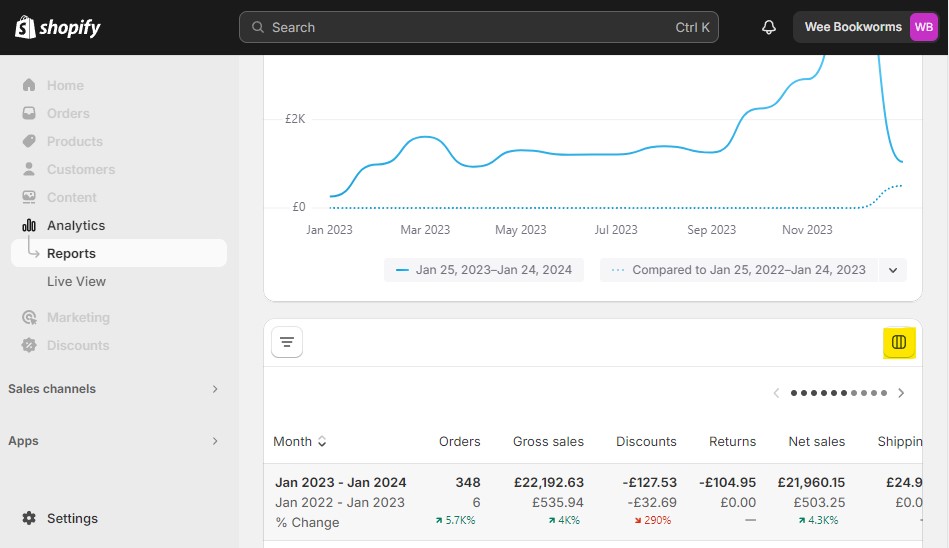
When you open a report, scroll down until you will see statistics and data displayed. Above the statistics table, there are two buttons: “Manage filters” and “Edit columns”. Click on the “Edit columns” button located on the right-hand-side of the page. To provide an example, in the image below showing my “”Total Sales” report, I have highlighted the “Edit columns” button. Look for and click on this same button in your report.
Lastly Add or remove columns
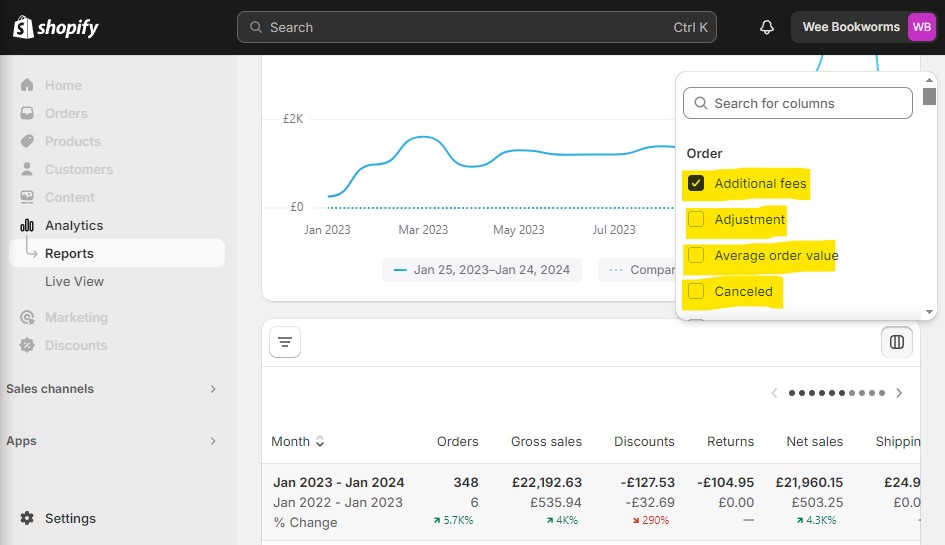
After clicking on the edit button. A drop-down list will appear. It has available columns for adding and removing purposes. Some columns have checkmarks, meaning they are chosen by default. To change what you see, tick the column you want to see and untick the one you want to hide. Press on the option you want to change.
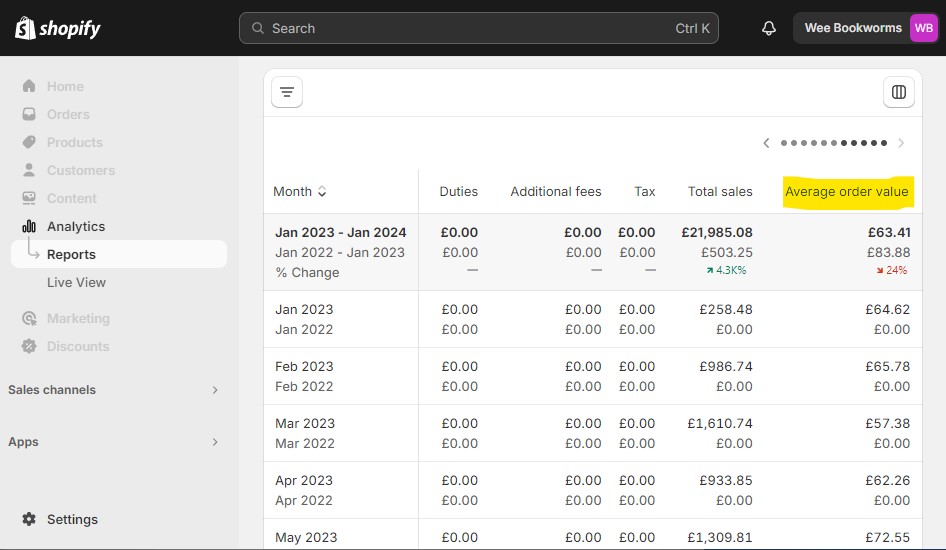
To view as an example the Average order value to your report, you need to add the “Average order value” column to your report. After selecting it from the columns list, please wait for the system to update the new column information and you will obtain the desired result.
If you choose to use the report now, you have the option to either print or export it. However, if you wish to save it for future use, please note that this feature is only available for users on the Advanced Shopify plan or higher.
In summary,
This is a guide on adding or removing columns in your reports on Shopify. It may seem complicated if you’re new to Shopify, but you’ll get used to it over time. We provide an example with photos to help you understand the process. We hope you find this post helpful. To learn more check out our posts on how you can create custom reports in Shopify.